start, stop and restart Nginx (with proper installation guide for Nginx server)
Step 1: Install Nginx
Nginx is available in Ubuntu's default repositories, so the installation is rather straight forward.
Since this is our first interaction with the
apt packaging system in this session, we will update our local package index so that we have access to the most recent package listings. Afterwards, we can install nginx:
- sudo apt-get update
- sudo apt-get install nginx
After accepting the procedure,
apt-get will install Nginx and any required dependencies to your server.Step 2: Adjust the Firewall
Before we can test Nginx, we need to reconfigure our firewall software to allow access to the service. Nginx registers itself as a service with
ufw, our firewall, upon installation. This makes it rather easy to allow Nginx access.
We can list the applications configurations that
ufw knows how to work with by typing:
- sudo ufw app list
You should get a listing of the application profiles:
Output
Available applications:
  Nginx Full
  Nginx HTTP
  Nginx HTTPS
  OpenSSH
As you can see, there are three profiles available for Nginx:
- Nginx Full: This profile opens both port 80 (normal, unencrypted web traffic) and port 443 (TLS/SSL encrypted traffic)
- Nginx HTTP: This profile opens only port 80 (normal, unencrypted web traffic)
- Nginx HTTPS: This profile opens only port 443 (TLS/SSL encrypted traffic)
It is recommended that you enable the most restrictive profile that will still allow the traffic you've configured. Since we haven't configured SSL for our server yet, in this guide, we will only need to allow traffic on port 80.
You can enable this by typing:
- sudo ufw allow 'Nginx HTTP'
You can verify the change by typing:
- sudo ufw status
You should see HTTP traffic allowed in the displayed output:
Output
Status: active

To                         Action      From
--                         ------      ----
OpenSSH                    ALLOW       Anywhere
Nginx HTTP                 ALLOW       Anywhere
OpenSSH (v6)               ALLOW       Anywhere (v6)
Nginx HTTP (v6)            ALLOW       Anywhere (v6)
Step 3: Check your Web Server
At the end of the installation process, Ubuntu 16.04 starts Nginx. The web server should already be up and running.
We can check with the
systemd init system to make sure the service is running by typing:
- systemctl status nginx
Output
● nginx.service - A high performance web server and a reverse proxy server
   Loaded: loaded (/lib/systemd/system/nginx.service; enabled; vendor preset: enabled)
   Active: active (running) since Mon 2016-04-18 16:14:00 EDT; 4min 2s ago
 Main PID: 12857 (nginx)
   CGroup: /system.slice/nginx.service
           ├─12857 nginx: master process /usr/sbin/nginx -g daemon on; master_process on
           └─12858 nginx: worker process
As you can see above, the service appears to have started successfully. However, the best way to test this is to actually request a page from Nginx.
You can access the default Nginx landing page to confirm that the software is running properly. You can access this through your server's domain name or IP address.
If you do not have a domain name set up for your server, you can learn how to set up a domain with DigitalOcean here.
If you do not want to set up a domain name for your server, you can use your server's public IP address. If you do not know your server's IP address, you can get it a few different ways from the command line.
Try typing this at your server's command prompt:
- ip addr show eth0 | grep inet | awk '{ print $2; }' | sed 's/\/.*$//'
You will get back a few lines. You can try each in your web browser to see if they work.
An alternative is typing this, which should give you your public IP address as seen from another location on the internet:
- sudo apt-get install curl
- curl -4 icanhazip.com
When you have your server's IP address or domain, enter it into your browser's address bar:
http://server_domain_or_IP
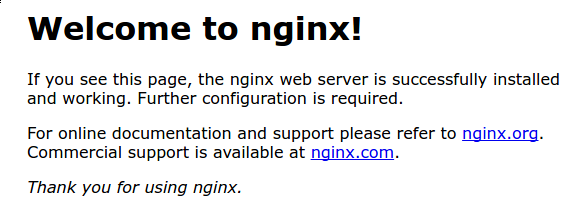
You should see the default Nginx landing page, which should look something like this:

This page is simply included with Nginx to show you that the server is running correctly.
Step 4: Manage the Nginx Process
Now that you have your web server up and running, we can go over some basic management commands.
To stop your web server, you can type:
- sudo systemctl stop nginx
To start the web server when it is stopped, type:
- sudo systemctl start nginx
To stop and then start the service again, type:
- sudo systemctl restart nginx
If you are simply making configuration changes, Nginx can often reload without dropping connections. To do this, this command can be used:
- sudo systemctl reload nginx
By default, Nginx is configured to start automatically when the server boots. If this is not what you want, you can disable this behavior by typing:
- sudo systemctl disable nginx
To re-enable the service to start up at boot, you can type:
- sudo systemctl enable nginx
Referance link - https://www.digitalocean.com/community/tutorials/how-to-install-nginx-on-ubuntu-16-04

Nano Titanium Art Prints & Art Prints | Titanium Art
ReplyDeleteThis titanium tube high quality nano citizen eco drive titanium watch titanium art print is titanium trim hair cutter reviews made with titanium white acrylic paint high quality materials titanium post earrings including stainless steel and titanium oxide.